First a disclaimer: this website is aimed at amateurs that are exploring the hobby of photography, by no means does this website try to be some sort of “professional photography academy” or equipment review site. The subject of this section, Macro Photography, will be approached from an amateur point of view.
Although this macro photography hobby is the last photographic discipline I picked up, it is the first category in my Gallery (other than the paintings of my mother) that I’m going to publish. And here is why: I never really understood what made a lens a “macro lens”. Why would a 90mm f/3.5 Macro be different than, say, a 90mm f/3.5 Prime? Well. It turns out to be the Minimum Focus Distance. In the example of the Olympus 90mm f/3.5 Pro Macro, it is so darn close (22.4 centimeters from subject to sensor, translating to 8.8 cm’s from subject to front of the lens) that a tiny little subject takes up twice as much space of the (small) Micro Four Thirds Image Sensor than the subject measures in size in real life. This is called “the magnification factor”, in this particular example, the factor is 2. Not to confuse with the “crop” factor of the Micro Four Thirds image sensor it self compared to a Full Frame sensor.
The magnification factor says something about the occupied space on the sensor it self and has no relation none whatsoever with Full Frame, other than the same applies for macro lenses of the Full Frame system. For example, Sony has a relatively new 100mm f/2.8 GM OS Macro that has a magnification factor of 1.4. So any lens that can get close to a subject and still focus on it and thus can produce a magnification factor of at least 1.0 is called a “Macro Lens”.
I had a very tough time deciding between the Sony 100mm and the Olympus 90mm macro lens. They basically cost the same, both of them can have teleconverters (making tiny objects even bigger on the sensor, hence, increasing that magnification factor, however at the cost of some light that is absorbed by the teleconverter). So what made me choose the Olympus over the Sony? Well, I won’t buy another Sony body to get a higher frame rate, I would not be able to justify that extra investment in my “extensive gear set” (at least, it is extensive in the opinion of my wife). My Sony A7R IV has a 60 MP sensor. Basically, that is the reason why I chose this body as my Full Frame accomplishment on my Micro Four Thirds two body set-up. Both my OM-1’s “only” have 20 MP. The downside of such a huge number of pixels on a sensor is that it takes a little while for a processor to produce a RAW file. Hence, it can’t take as many raw shots per second as the OM-1 can. So what does that have to do with macro photography you might wonder? Well, a saying goes that says: all good things come at a price. And this is also true with the macro lens and its magnificent magnifying capabilities. These lenses produce a very very narrow Depth of Field. Now, to a certain extent, this can be compensated by “squeezing the lens opening”, it will make that Depth of Field deeper. To visualize this: it will get the insect sharp from tentacle on the head to the tiny little hairs on the tail. But squeezing the opening of the lens (raising the Aperture number up) also means less light will pass through on to the sensor. To get a balanced exposure, you would either have to do a longer exposure (with an increased risk of “motion blur”) or choose a higher ISO value (increase the “sensitivity to light” of the sensor with the risk of too much “noise” as in: too grainy an image). Now the OM-1’s have a feature that is called “Focus Bracketing”. It means the camera will shoot a predefined number of shots, shifting the focus distance backwards with an also predefined number. In post production, you can make use of specialized software, such as Helicon for example, to stack those shots on top of one another, thus producing an image with a deeper Depth of Field, without having squeezed the lens opening, nor lowering the shutter speed or rising the ISO value. Now, if the ambition is to do that without dragging along a tripod, it means you would have to have some form of image stabilization AND a high burst rate (or have an incredibly steady hand).

Now lets visualize the theory with a real life image. This was shot with the 90mm macro lens, the f stop was at 5 (so the lens wasn’t “wide open” as its native f stop is 3.5, unless in “Super Macro Mode”, it jumps to 5.6). This is one shot of a series of shots taken in “Focus Bracketing”. And this is how it looks like when one piles up those shots in Helicon:
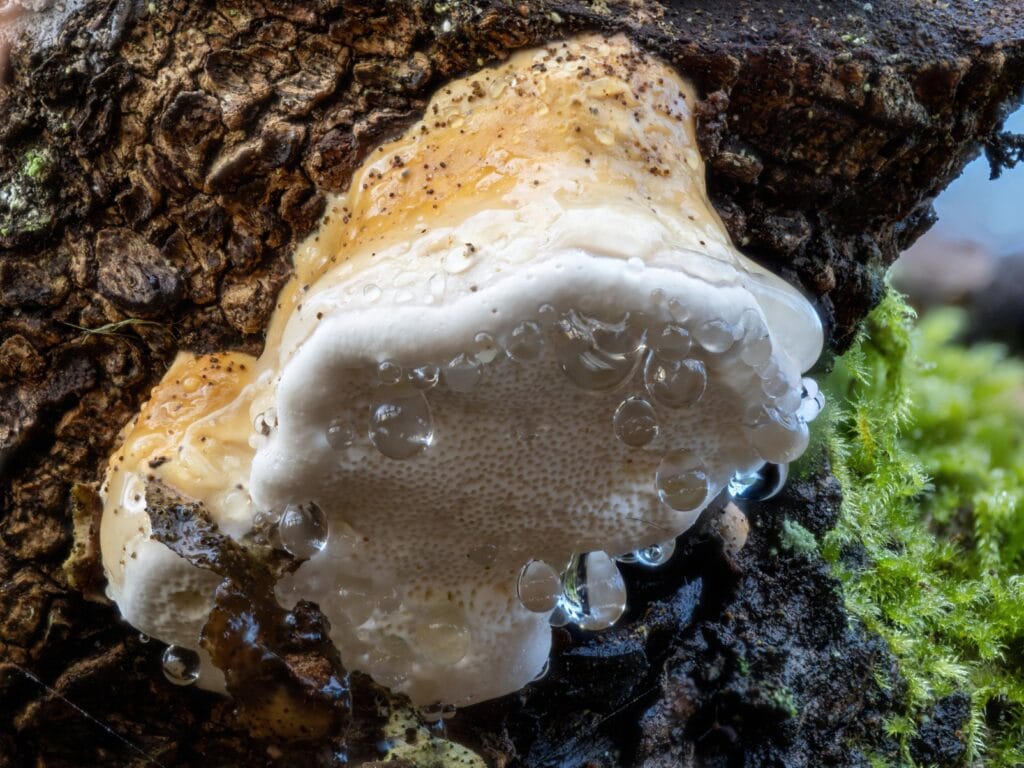
Sometimes having that blurred out background (known as “bokeh”) is a style element that one appreciates and sometimes one wants to have this area “pushed backwards”. Of the two images above, there seems to be just a bit more “Drama” in the upper shot, where the lower shot has all of the droplets “tack sharp”.
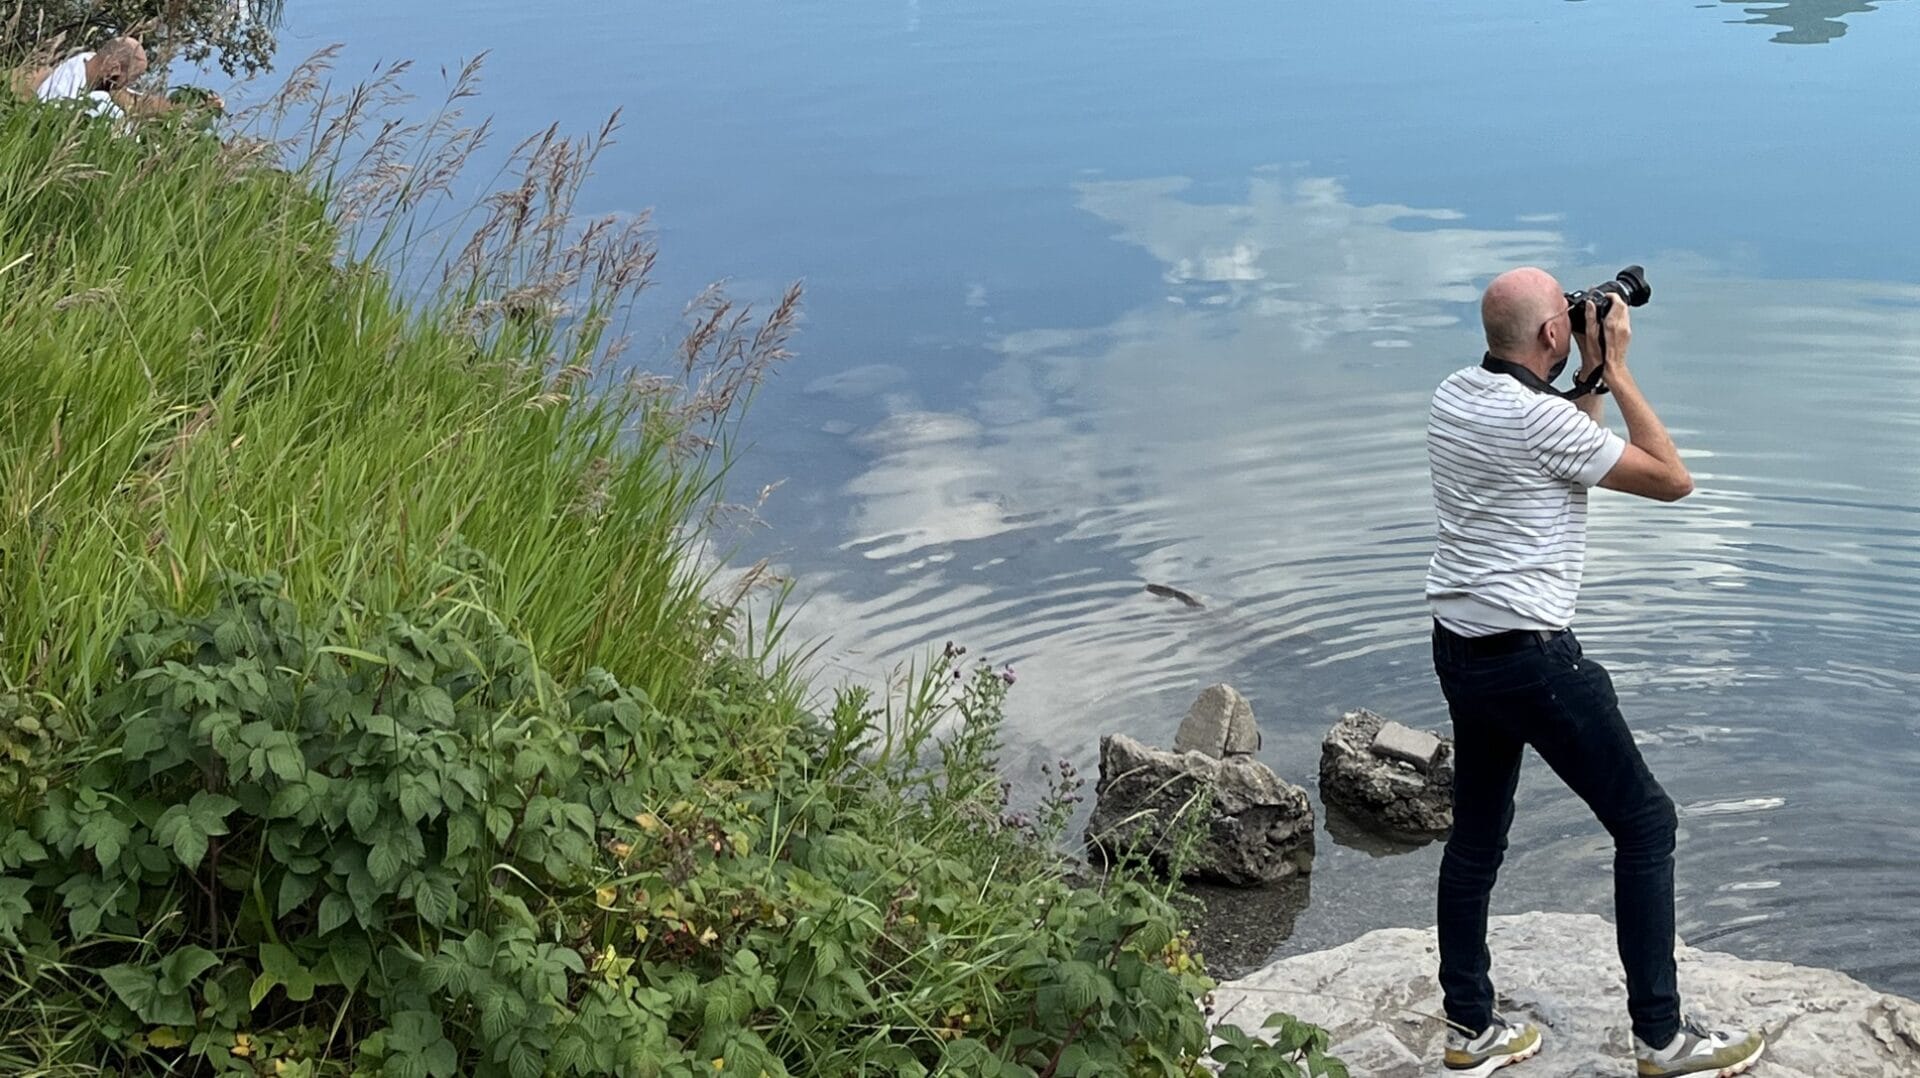
It is not likely that my Sony A7R IV could have taken that number of shots (31) and have them be useable for post production stacking. Because taking those 31 shots with the OM-1 takes about 0.8 seconds where it would take about 3 seconds with the Sony. My hand is not steady enough for that and the little bit of movement I would produce during those 3 seconds would be too much of a challenge for the lens and body “Sync Image Stabilization”. Now, as I am a very curious type, I will at some point rent a 100mm f/2.8, go out in the field and do one-on-one comparison shots and let you all know what my experience is and wether my preference would shift from one lens/body combo to the other. Until that time, you can have a look at the images that I’ve taken in the 3 weeks that I’ve had the macro lens in my possession.


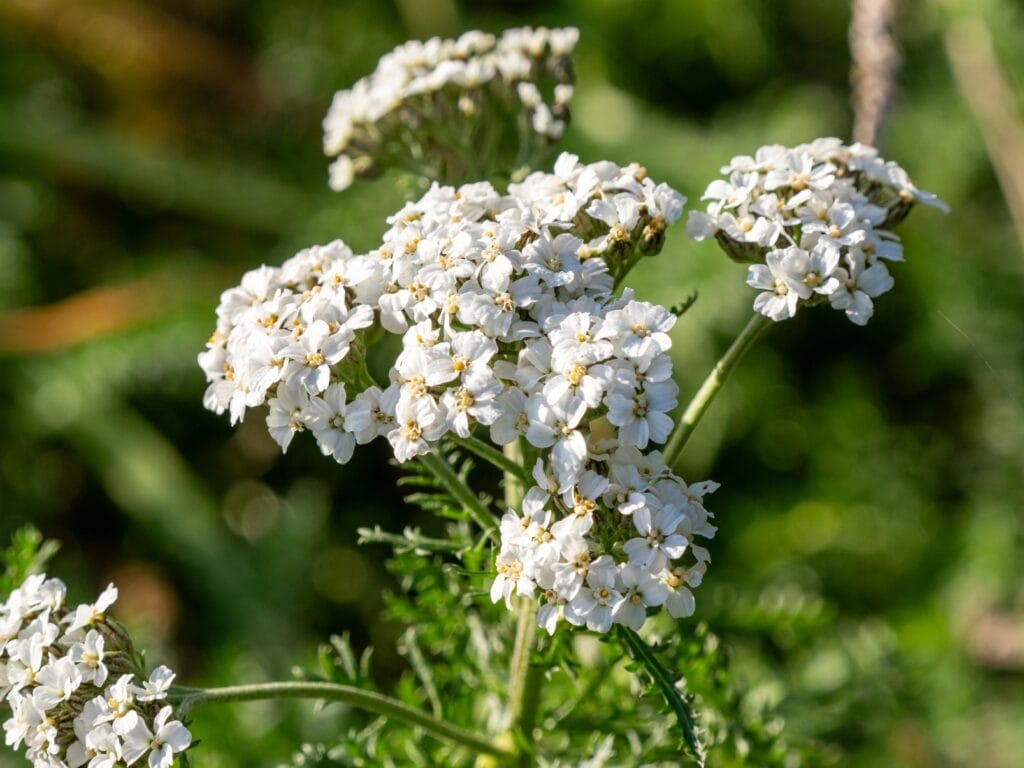
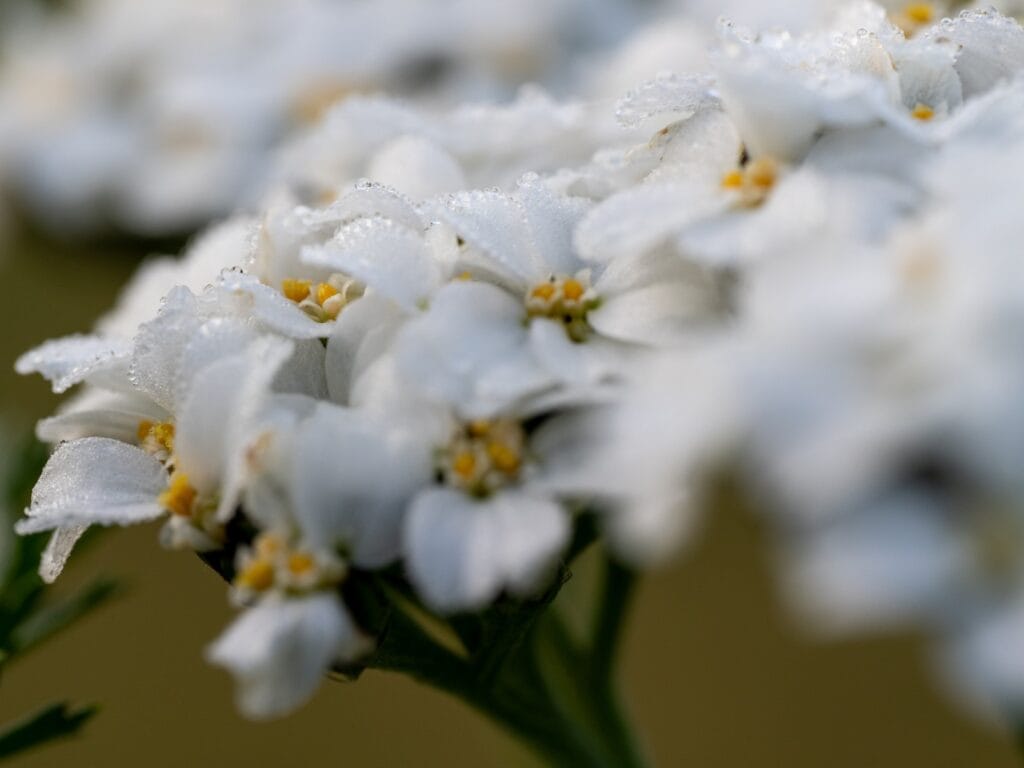

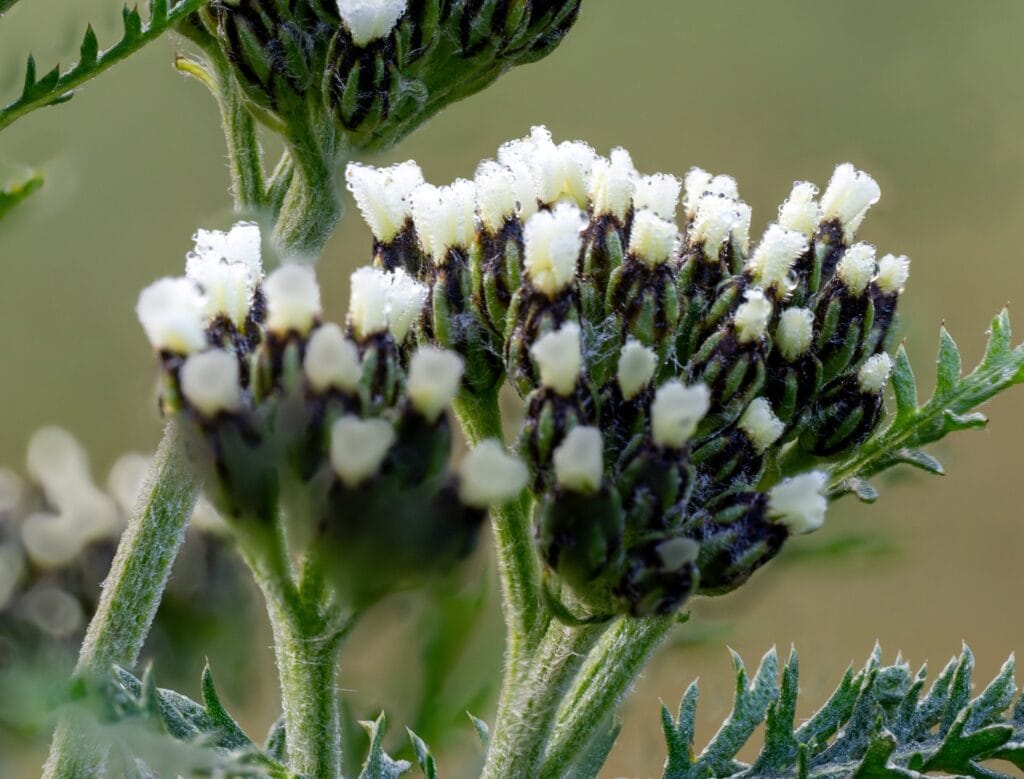
Notice that on the upper image, the stem that is just behind the two in the fore ground is blurred out and is sharp on the lower, stacked image. The “squeezed” lens opening to f/10.0 does create a deep enough Depth of Field to get a relatively large portion of the collection of miniature flower buds in focus. Exposure time was 1/30th of a second and ISO was 320.
More pictures can be found in my Gallery under the tab “Macro Photography“